


While working on a new sewing project (a top), I was getting frustrated and ready to give up. I wasn't ready to retire the sewing machine for the evening, and was trying to think of what I could make and not screw up (ie. end the night on a satisfied note) when Peanut ran by. As I mentioned, we are dog sitting my family dog for a couple of days. I thought she defintely needed a new collar, and I got busy. Here's what went down.

Start with some slippery fabric (nylon)
(this was the lining from a thrifted skirt - which I specifically bought to take apart)

Cut a strip, about 4 inches thick

Serge the edges so it doesn't fray (or do a zig-zag stitch as I did)


Fold the fabric and start to sew the ruffle...

Ta-dah

Grab some pretty ribbon...

...I sewed two together for a pretty look

Attach the ribbon to the ruffle
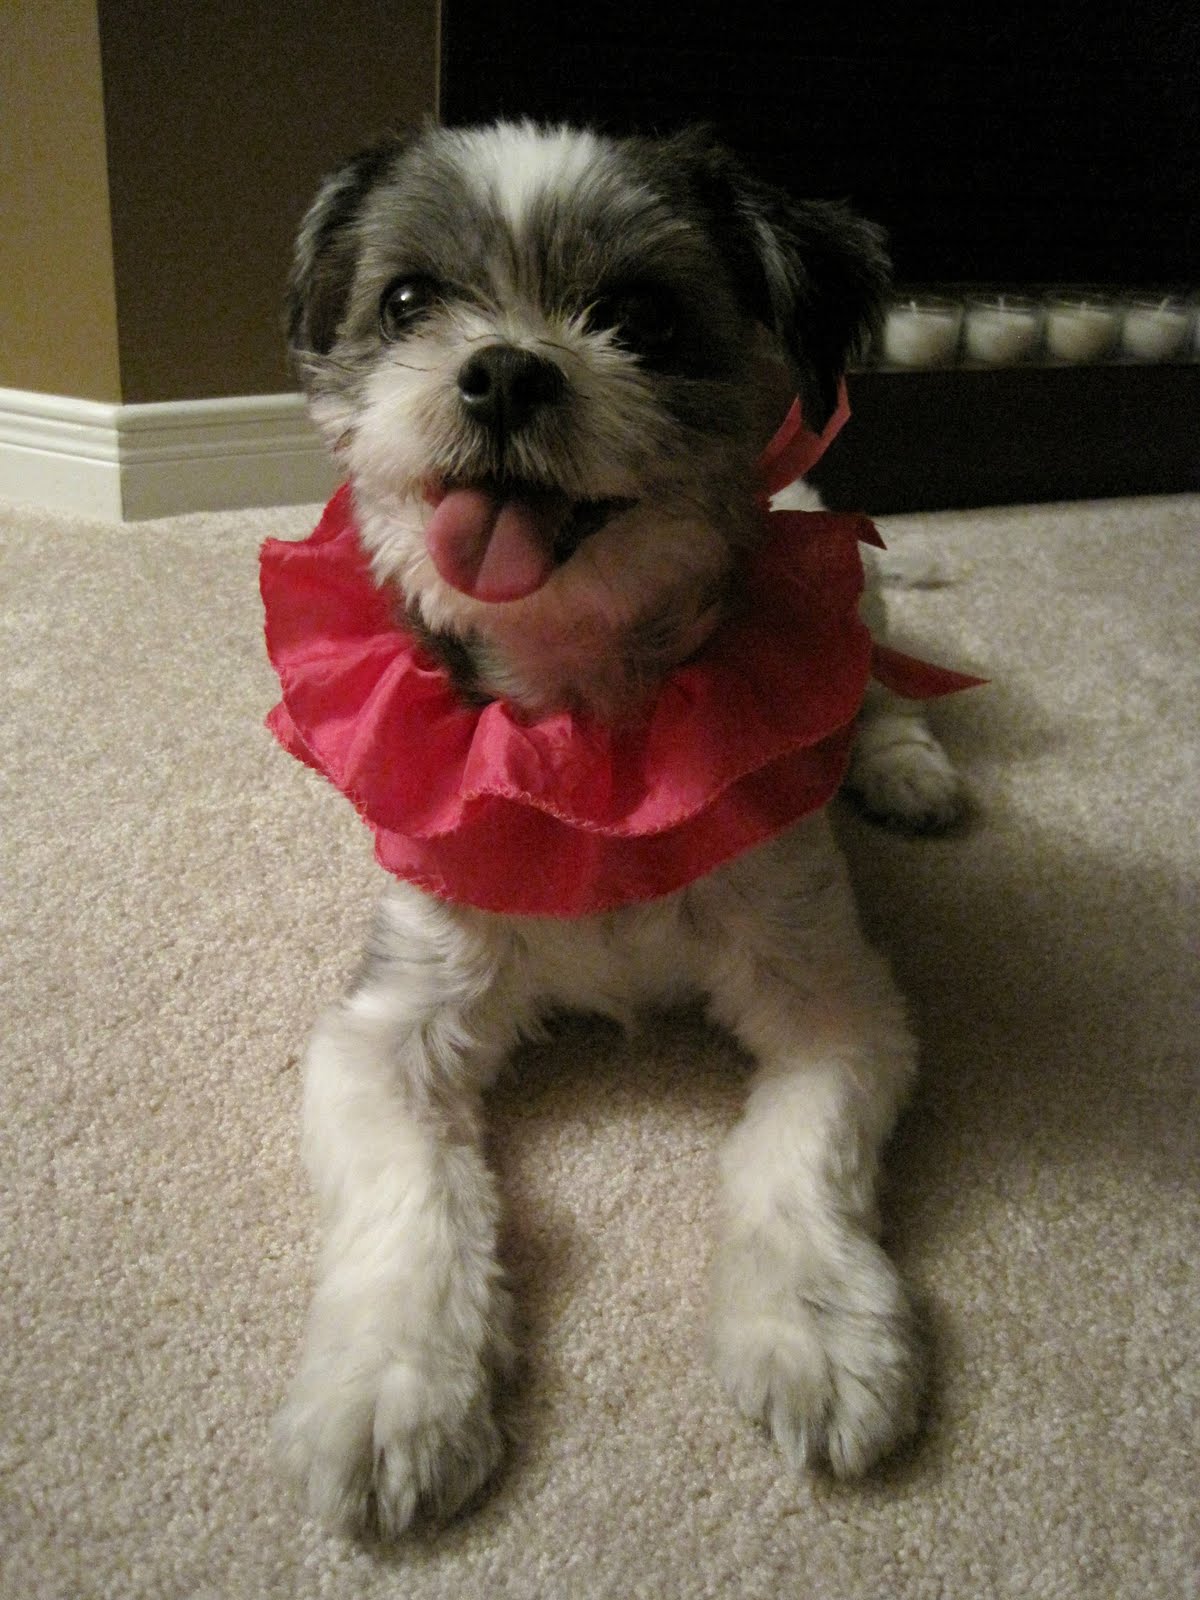
Voila!

13 comments

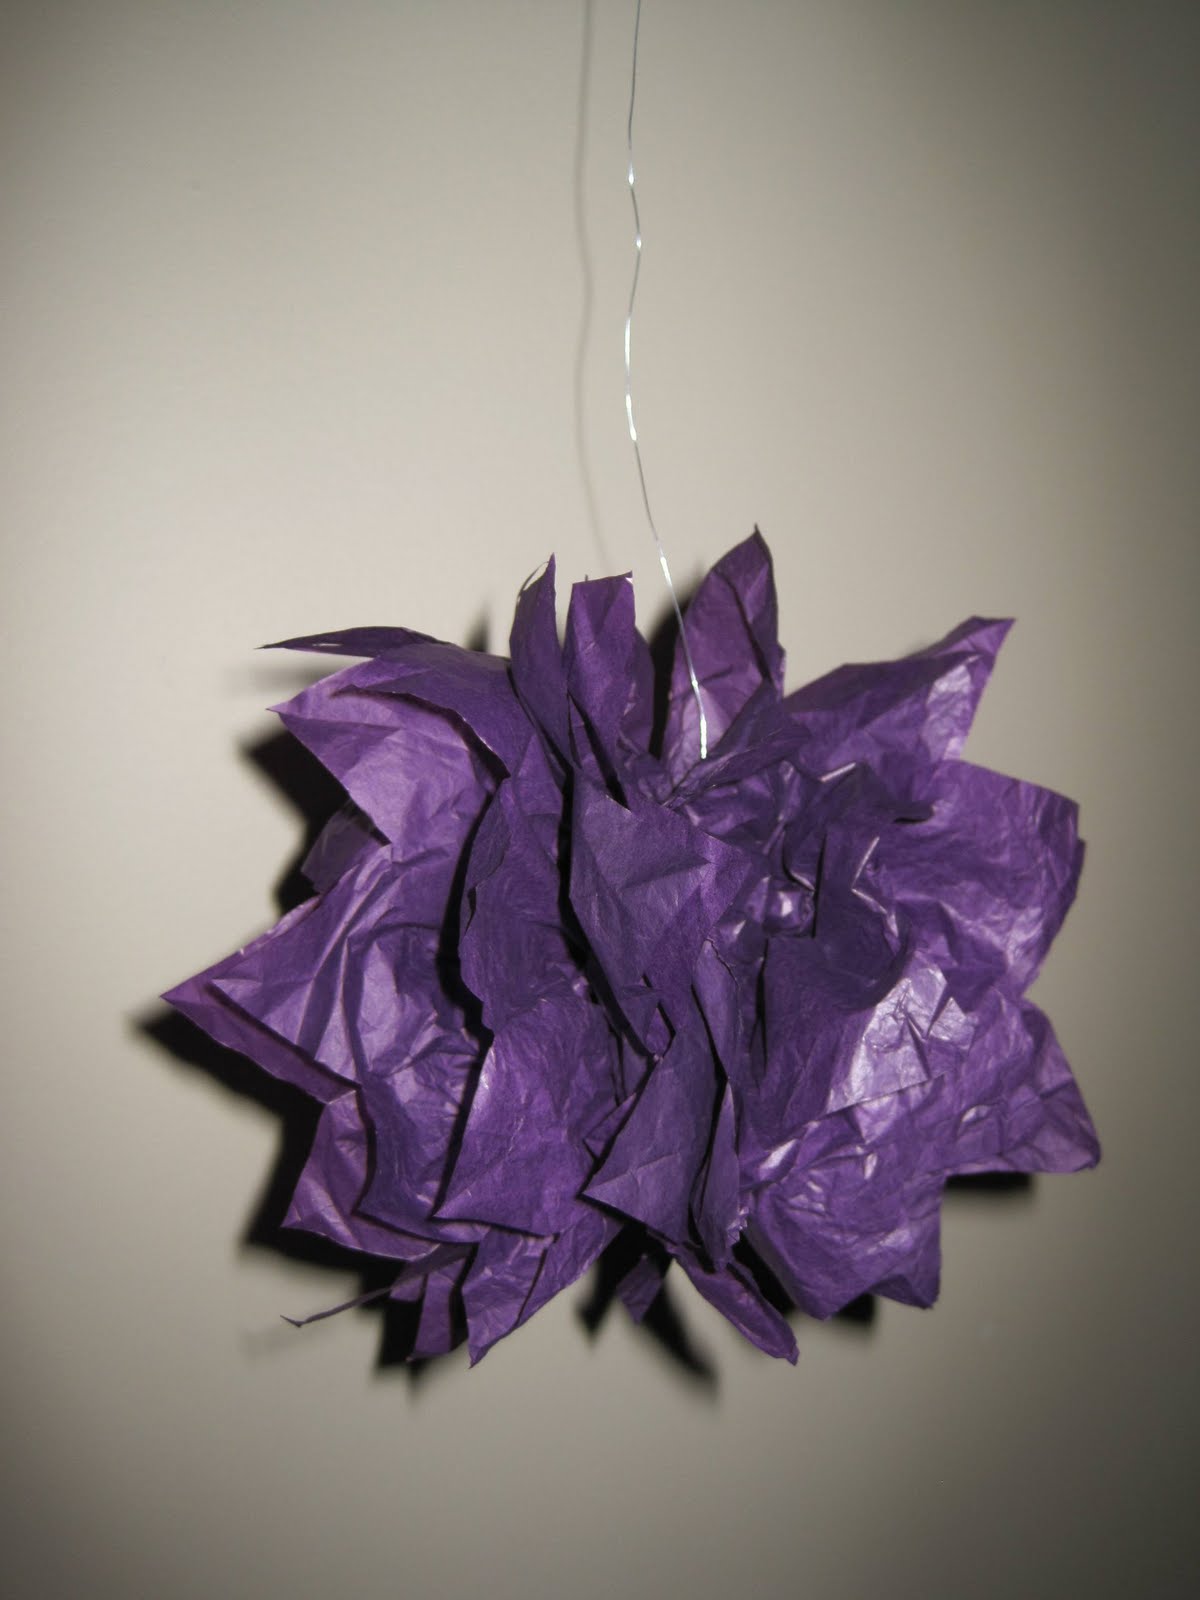
While perusing the Martha Stewart wedding site, I came across these lovely tissue paper pom-poms. Not only are they easy, but they make a statement, especially when you hang several, like in the picture above. Below, I've outlined how I did my own.
 What you'll need: tissue paper, florist wire, scissors...
 ...8 sheets to be exact
 Fold the sheets accordian style on the longest side...
 Once you're done folding...
...Round the edges...

...Voila
 Snip a bit of wire...
 ...Wrap it around the centre of the folded tissue
 Pull apart each layer...
 ...Until you have a 'bouquet'... then pull apart the other end/side and...
Voila!
String with fishing line or more wire, pin into ceiling and you're done.
A baby version of the one above, in a darker purple.

First ...loveMaegan did it. Then elisharon did it. Then it was my turn! Thanks for the great inspiration girls.
Will you make your own?


{ I sewed two ribbons together to make the strap }


 *
*I am loving Jeffrey Campbell studded wedges so much, but the price tag that goes along with them? Out of reach. So, I have decided to try and re-create my own version of the studded shoes.
I started with an older pair of wedges from Aldo (which actually, I purchased a second pair the following year at a super discounted price because I had loved them so much the year earlier - and they still had my size, rare and amazing) with a hemp/espadrille base (cork would work too).

{ I needed 500 push pins }

{ start with the bottom row and push the pins into the wedge along the sole }

{ second row of pins fit in between the first row }

{ thumbs are getting sore at this point }

{ ta-dah! }


* Sorry for the crappy quality pictures.
My camera died and I was forced to use my iPhone

{ circle scarf }
I've wanted a circle scarf for a while now, but didn't want to pay the price that went along with one from a store. So, I headed to my closest fabric store, picked up 1.5m of yellow jersey fabric to see if I could make one myself. I'm pretty excited with the end result because it turned out quite nice! I'm no sewer by any means, but my mom has a sewing machine that I've hemmed pants the odd time, so I gave it a shot. I learned how to create a french seam during this project too, and can't wait to wear my new accessory!

{ yellow jersey fabric - the colour looks pale, but it's quite a vibrant yellow }

{ sewing the second seam to create a french seam }

{ this shows the french seam -
unfortunately I didn't have any yellow thread, so this will have to do }
Ways to Wear It:

{ around the neck }

{ length-wise around the neck }

{ length-wise wrapped around the neck }

{ doubled-up around the neck }

{ hooded & doubled-up around the neck }

{ shoulder shawl }

{ one-sleeved top }

{ criss-cross }

{ tied at the shoulder & belted as a dress }
Subscribe to:
Posts (Atom)