


Before After
So you want to bleach your denim? Cool. Do you have patience? Even better. I bought this Gap denim jacket at the thrift store in the spring with the intent of doing this DIY, however, when I got it home I decided I really liked it and didn't want to change it. Then, when I saw the photo above on the left from an outfit post, I realized I really didn't like this jacket as much as I thought and so it went to the DIY pile. I finally have gotten around to posting this, so sorry for the delay.

Submerge the denim in water until it's wet all over. Wring out and place on a flat surface.

Using an old Windex bottle, I filled it with bleach and sprayed the jacket. A lot. And when I say a lot, I really mean I ended up pouring bleach onto the jacket because spraying wasn't doing jack squat.

I used an old toothbrush to spread out the bleach I poured onto the jacket and brush it into areas.
I really focused on the seams. Once dry, I washed and dried the jacket.

Ta-dah! (more pictures here)
13 comments

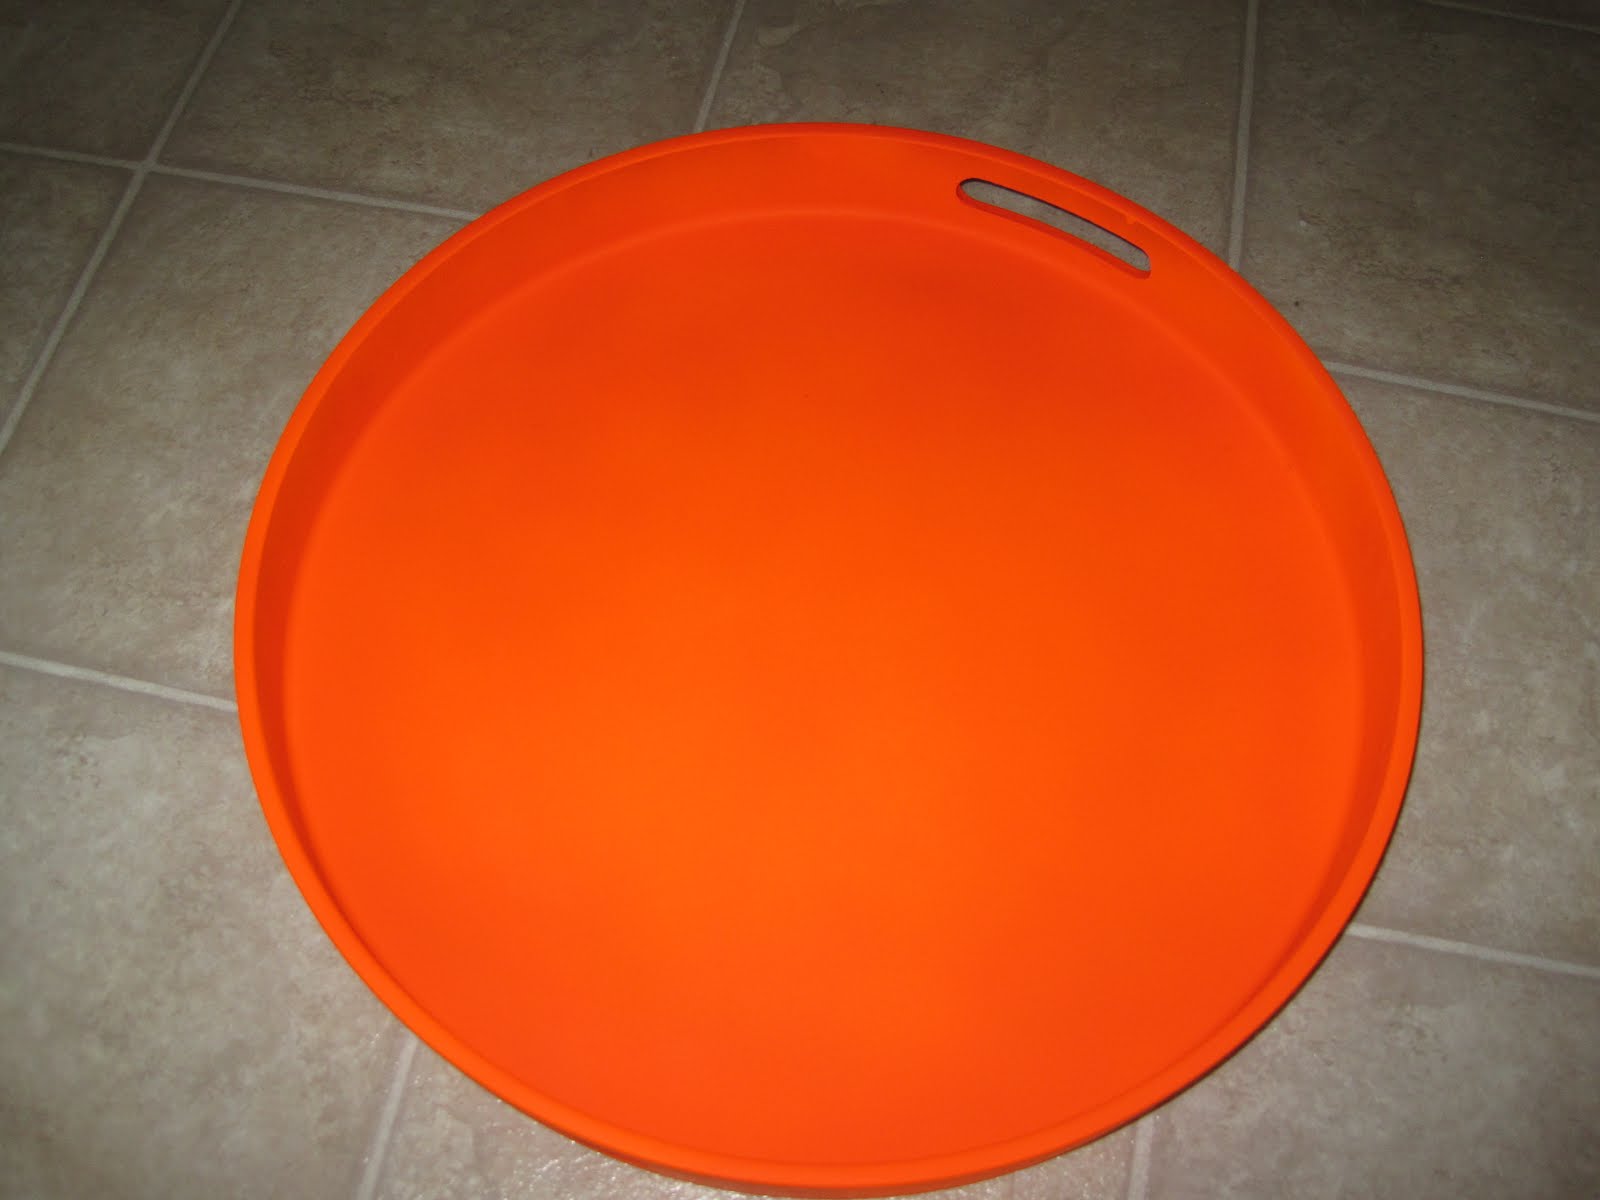
I found this fabulous navy blue (sorry, I forgot to take a pic) tray at a local thrift store a couple months before the wedding. I thought it would be great for something, and potentially as something on our (orange) candy buffet. I immediately bought it (for $2) and brought it home. I picked up some neon orange (like my wedding shoes) spray paint and went to work. We ended up using the tray to host the little plastic bags we put out for people to put their candy in and it worked out perfectly!

{ dollar store stickers}


{ at the wedding - we used it to hold the candy bags for the buffet }
You can see the 'ugly people' I was talking about above }
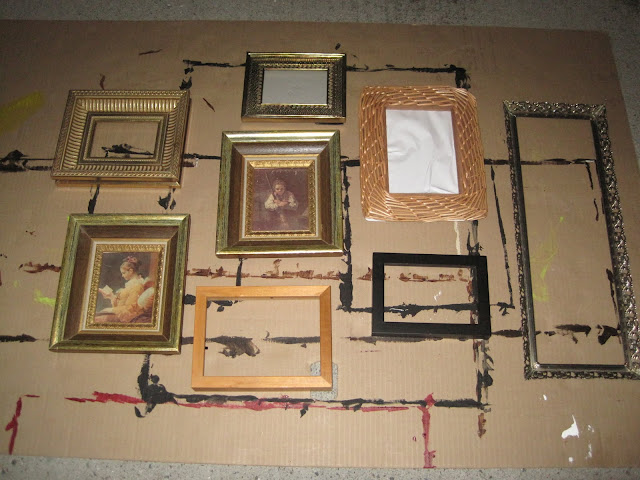
For our wedding, I wanted to be as crafty as I could to really personalize our special day (and save money). I started shopping early on (well, not that early considering we planned our wedding in five months) and would hit up various thrift stores, at least weekly in my hunt for picture frames. Once I had a good variety, I grabbed some metallic silver spray paint from the local hardware store, and went to work. The finished product looked so great at the wedding. We displayed our engagement shoot photos in the frames, which we had kept a secret from everyone until that day.


{ displayed at our wedding }

Hi! I'm Elle Sees and I'm happy to be guest blogging for A.Co while she's honeymooning! I'm an Atlanta blogger who loves all things fashion, beauty, food, and travel. Today, I'm sharing my DIY: Handy Hints.
I like handy hints - things that make your life easier and involve new uses for ordinary things. I've heard/read these over the years and they really work. I'm sharing a few below, but there's plenty more where these came from! You can also follow me on Twitter and my blog where I'm having a Back to School Week. Enjoy!
- Coffee filters: You can cover food in microwave, clean windows/mirrors, and stop drops for Popsicles with these.
- Make a reusable gel pack for your cooler by filling a Ziploc bag with 3/4 dish detergent and sealing it shut. Pop in the freezer and use anytime. Great as an eye pack, too!
- Use an aluminum ball in place of dryer sheet (2-3 inches thick).
- Dry your nails in cold water to speed up time.
- Vaseline can work wonders for dry skin. I've put it on my feet at night with socks.
- Crush 2 aspirins and make a paste with a little water for zits. Leave in 15 min. and then wash off.
- Speaking of zits, I use Visine on them.
- Use a Post-it note to clean in between a keyboard.
- Clear nail polish on bottom of a can in shower can prevent rust.
- Use your flat iron to iron between buttons (this reminds me of LC on The Hills!).
- Try a contact case for pills (not child-proof) when traveling.
- Dryer sheets are a lifesaver when trying to get the nasty smoke smell from your hair.
- Conditioner can be used in a pinch instead of shaving lotion.
- Deodorant stain? Use pantyhose, Spanx or baby wipes to remove.
- Grease stain? Rub chalk on it (It works sooo well, but who has chalk?) or use artificial sweetner on the spot. I've used this tip especially when dining out and traveling.
Hope you enjoyed the hints! What are your fave handy hints?
Hi everyone! I'm Emily from emily loves and I'm so excited to be writing for Amanda today! I love her blog and was super pumped to be able to write a blog post while she's on wedding vacation. Congratulations to you two! I can't wait to see the pictures!
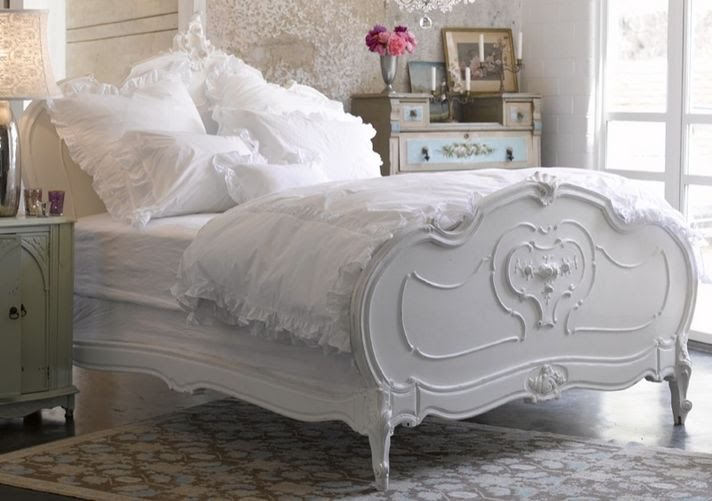
For the last six months I have spent a lot of time looking at decorating magazines and blogs to get ideas for what I want my first place to look like. I haven't come to a real conclusion but one thing I am fairly certain about is that I want my bedroom to be a white based modern-shabby-chic. (Is that even the real term for it? I don't know) I'm not really into all the flowery-ness of most shabby chic rooms but I have found lots of white ones with only slight flower accents that I love.

I decided my first bit of room decorating would be a jewellery stand, clearly the bling takes priority! My original inspiration came from tiered dessert stands, but I wanted one made of old china instead of just generic plates.
 Since I couldn't find one pre-made I searched until I found matching dishes that were in good shape and for a reasonable price to make my own, it took about 6 trips to 3 different thrift stores to find them, but eventually I found a set I liked. I also picked up mini port glasses to use as the risers between the plates.
I tried using crazy glue because I didn't want to see glue lines but it didn't set very well so I pulled out the trusty glue gun instead and after a mere 5 minutes of work I had my new jewelery stand!


How do you store your jewellery?

I bought these frames from the thrift store not too long ago and planned to use them at our wedding. However, since they didn't posess a glass pane, I decided to use them for something to use as decor in our home. You should have seen these frames when I bought them - so ugly. They were brownish-gold with the worst picture inside (one was of a woman in the old days, very chubby and ugly and the other a chubby man clutching a shotgun), which I quickly spray painted over. Once they were dry, I found some fabric and got busy.

The accent colour in our home on the main level is orange, so I used this orange fabric

I used the picture and cut the orange fabric to a square slightly larger...

...then hot glued the fabric to the square

Once glued, it looks like this on the back...

...and like this on the front

Nice, but it's missing something...

...so I grabbed this gauzy fabric I had to wrap the orange fabric


Voila!

I have recently developped a small obsession with burlap. It's textured, it's cheap and it's oh-so-trendy right now for home decor. After seeing multiple DIY projects involving burlap, I hit the fabric store and got myself some for my own DIY.
This is so simple, so quick, and so awesome. All you need is a hot glue gun, a frame, a small piece of burlap (to fit your frame) and some sort of embellishment (a coin, ribbon, a bead, a button, etc. Be creative!).

{ burlap, $4/metre }

{ thrifted frame, $3 }
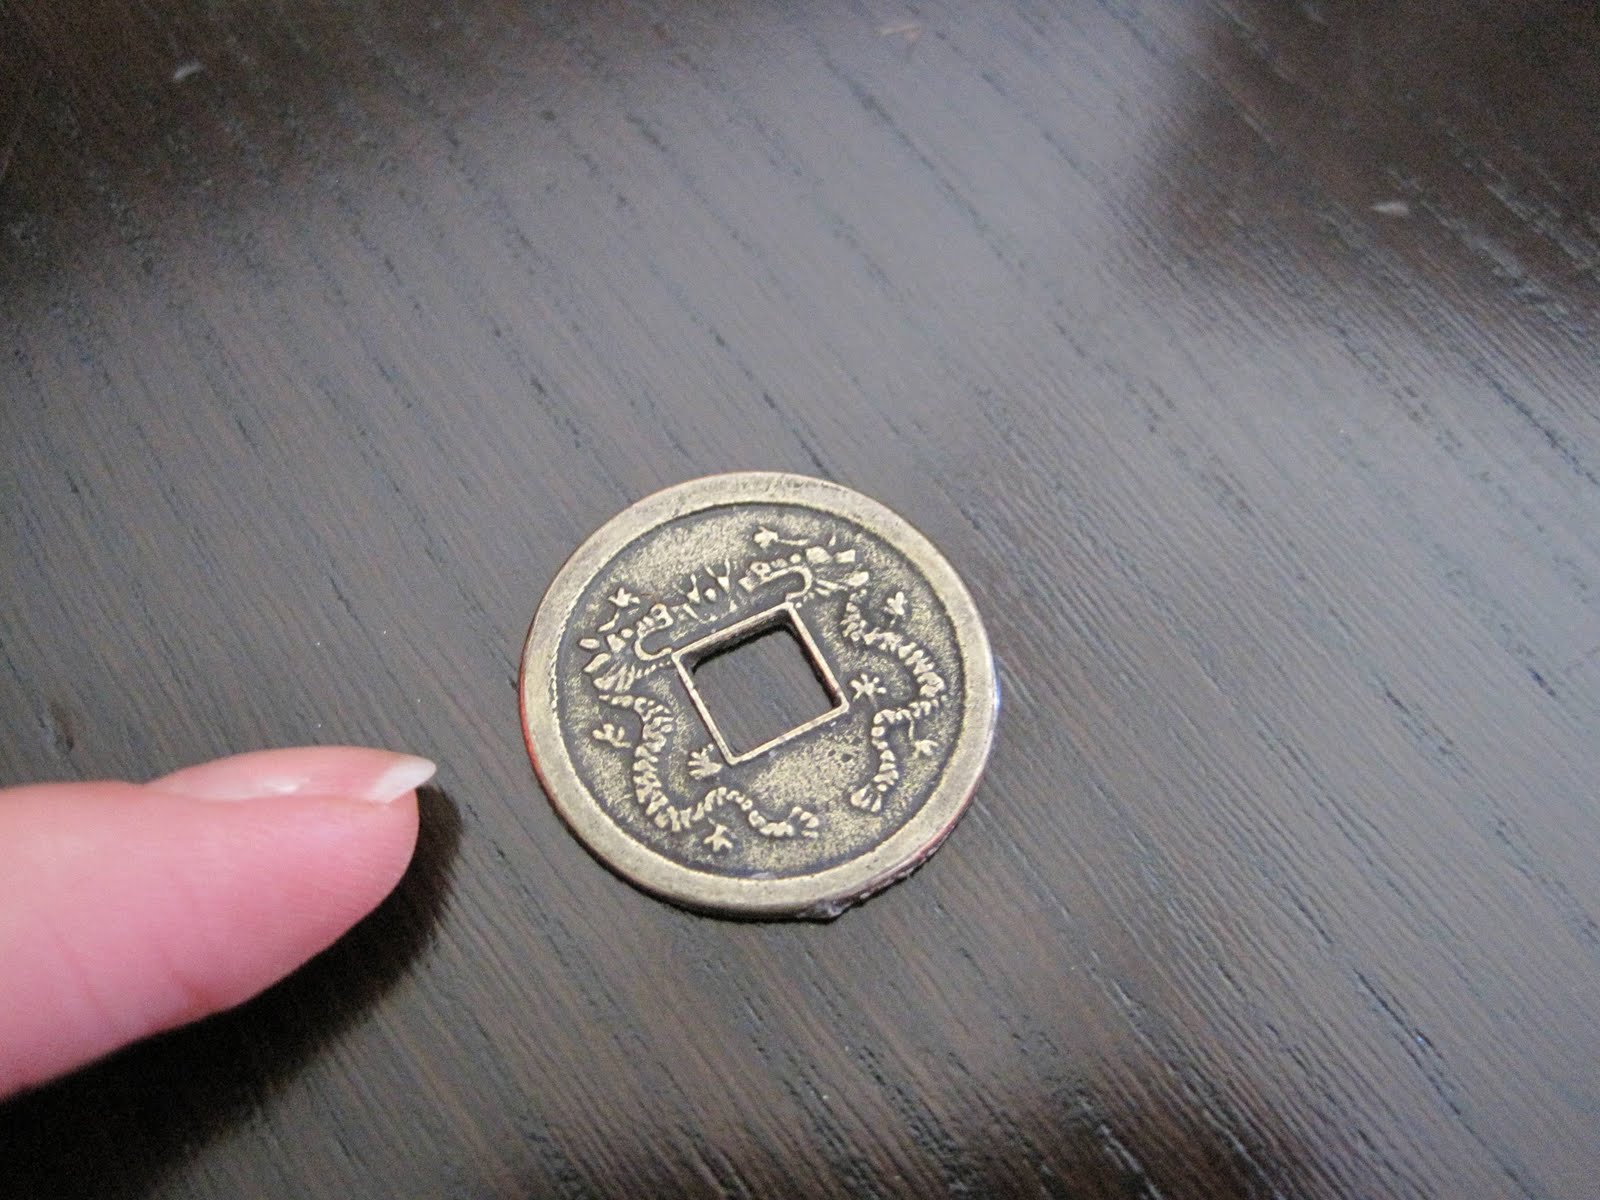
{ I pulled this 'coin' off an old candle }

Cut burlap into size of frame's window (mine is 3x3)

Using your hot glue gun...

... Attach your embelishment to the burlap

Insert burlap square into frame

Voila!

When I saw Lena's post, I was immediately inspired. While thrifting later that week, I actually came across these awesome (men's) Silver jeans. I used to be a total sucker for Silver jeans when I was younger - they were my absolute favourite. Now, they don't exactly do much for my body type, but I'll always have love. The men's version, on the other hand, were exactly what I was looking for though: great wash, thick waistband, large back pockets and a fab distressed look ... in my size! The woman at the cash confirmed they were men's jeans to ensure I still wanted them - ha, that's why I wanted them!
After washing and drying the jeans, I went at them with the scissors to create the perfect denim cut offs.


The length was still a little too long so...

...I cut 'em shorter

That's better

Next I cut slits on the sides

Then frayed them up with a knife and scissors along the raw edge
(once they are washed, they will fray more)

Voila!


PS - I know I'm so behind on all your blogs, and I'm sorry I've been a little MIA
(the wedding is sucking me dry ... blah blah blah, I know, I know ...)
Subscribe to:
Posts (Atom)